Showing posts with label DIY. Show all posts

Monday, April 1, 2013

DIY: Use a picture frame as a tray

Hello Lovelies,
Have you noticed how trays are getting more expensive everyday and some of them are not even that pretty? Well, I decided to make myself a tray using an shadow box I bought from Walmart for $5.99 and I show you step-by-step how you can do it too.


What you need:
- 1 shadow box or a picture frame (Dimension: 11.5" x 9.75 " for $5.99 from Walmart)
- 1 pair of handles ($3.99 from Walmart)
- 1 magazine of your choice
- A screwdriver and screws (type 4)

Step1: Remove everything that is inside the frame and take off the little standing stick behind the picture frame.

Step 2: Measure where you want you handles to be. I decided to put the handles on the sides of the picture frame because I didn't have enough space for the handles on the top sides. Once you've marked where you're going to insert screws, screw both handles on the sides. Make sure you leave enough space between the screws and the frame floor because you are going to put back everything you took out of the shadow box and they'll have to fit (especially the glass since it can't be bent) in between the screws and the picture frame floor.

Step 3: Remove one of the handles to place the glass and screw the handle back to where it was.

Step 4: Choose an image from your magazine and put it inside the box, followed by everything else back inside the shadow box (I took an Miss Dior perfume image from BAZAAR April 2013).


Step 5: Now step back and admire your work! 


I'm predicting that in the near future, I'll have more than one framed tray! (ha!)
Have a Lovely day,
Thanks for reading!

P.S. Come back on Thursday to see my outfit of the week and don't forget to follow me via BlogLovin!


Friday, November 23, 2012

Helpful DIY projects

Hello Lovelies,
I have found very interesting and helpful DIY projects so I wanted to share them with you guys.


Thanks for reading and Happy Thanksgiving!

Tuesday, October 9, 2012

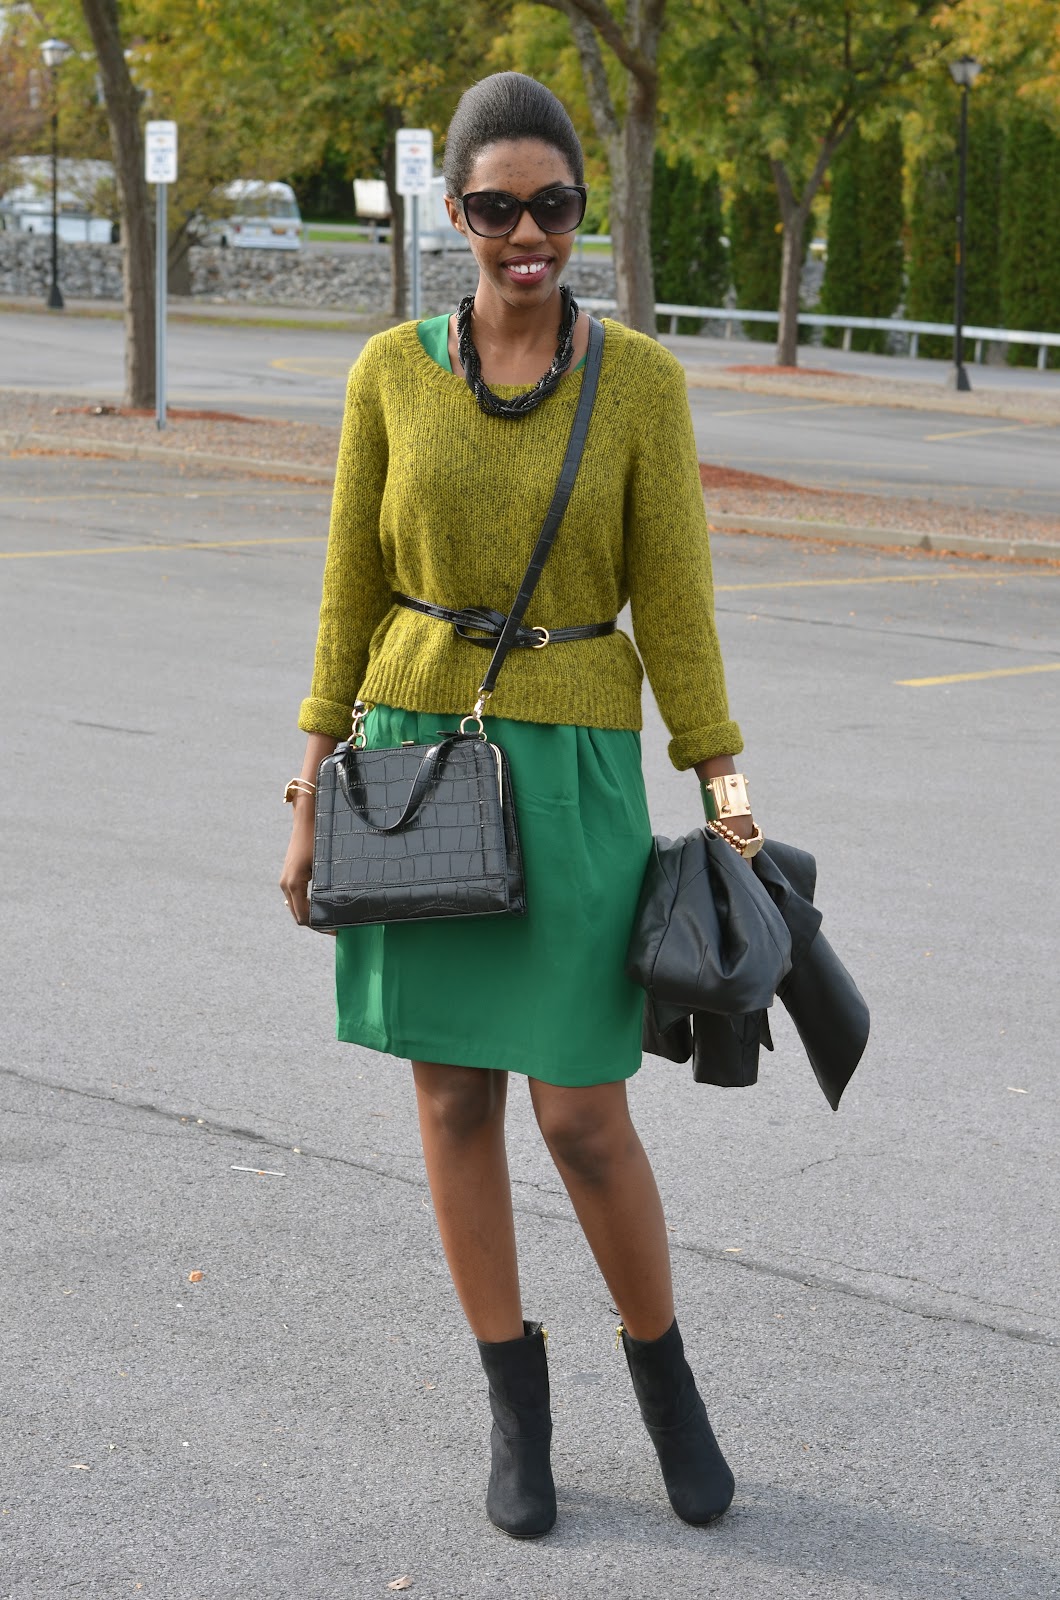
Shades of Green + Quick DIY

Hello Lovelies,
I'm beginning to really be a big fan of Green. This is color I never had in my closet and now I have it in (almost) 50 shades. 

[Wearing]: H&M black suede boots (similar here) | H&M emerald green pencil dress (similar here) | H&M yellowish green cashmere sweater (similar here) | Sheinside Round neck Peplum leather Jacket (here) | Accessories: 80's purple sunglasses, H&M, Charlotte Russe, Forever21 faux croco snap frame shoulder bag (last seen here)


Yesterday, I decided to pair my green dress with a yellowish green sweater as we all know, the weather is getting colder and colder by the day. It wasn't too cold for me to add a leather jacket but at night it can be very cold here, Upstate New York. Then, since my legs were not covered I had to balance my look and the weather by being very and well covered on my upper body. For a side note, you have probably noticed that the dress is loose and no tight on me, it's because I chose to buy 2-3 sizes bigger than my size as I wanted my dress to be like this on me.


Quick DIY: Spices Organizer 

I made this quick box from a package box that I received from 80's purple sunglasses after they sent me glasses I ordered, including the ones I'm wearing with my outfit in this post. I know you probably have small boxes in your house, apartment that you're about to throw. So just recycle it by using it around in your home like I did.


1. This is one kind of boxes you can use, 2. Cut the top part, 3. Take off any sticker that is on the box, and 4. There you have a small box for your spices bottles :)
  
Thank you for reading my post and Happy blogging yall :)

Thursday, August 9, 2012

DIY: Back Cross Tank top

Hello Lovelies,
GoJane Tank Top $22.99
Do you like this top? Do you want one like that? Well, consider yourself already as an owner of a top like this! I will show you how you can make this back cross tank top from an old one that is compressed and suffocating somewhere far in your closet.

What you need:
- A tank top (almost as long as the one in the picture above)
- A pair of scissors
- a ruler (please use cm)
- A washable marker
- the picture below for measurements
- your magical fingers!


Step 1: Tracing of the Rectangles
First, you need to reverse your shirt because you're going to use a marker on it, so it's better that the traces of the marker be on the inside where they won't be visible. Then, find where you want to start your first rectangle (you should make sure that you have at least 47cm of space from the top to the bottom, in which you will place all the vertical rectangles, and 23 cm  for the horizontal rectangles). Using the measurements on the picture above start tracing your rectangles (3 cm x 1 cm). Each rectangle should be separated from the next rectangle by 1cm (refer to green marks on picture) and make sure your top is straight all the time, otherwise you will end up with rectangle that are not aligned in straight lines (You can pin the top to the surface below it to secure it from moving at every of your movements). 


Step 2: Cutting the rectangles
Now that you're done with all the rectangles, it's time to cut them off. Make a small incision on one side of each rectangle (see picture below #1 and #2) and then start cutting the rectangles off (See picture below #3).


Step 3: Finalize your work
Are you done already? Good Job! Now it's time to finalize your work! Twist once and lightly the clothing tissue left in between the rectangles, then wash the top if the marks are visible (see above picture #4). Once your top is dry, return it to the right side et Voila! You have a new top!

Did you like this DIY project? Leave me a comment below and if you have some cool DIY projects you would like me to see, leave also the post url.

Thanks for reading my post! 

Sunday, August 5, 2012

DIY: Avocado Smoothie

Hello Lovely,


You have some time to spare and you don't know what to do? How about you make an avocado smoothie! It's very easy to make and will not take you more than 30 minutes.


Ingredients:
  1. 3 avocados
  2. Milk (used whole milk)
  3. Honey (preferred) or thick caramel
  4. 4 Ice cubes
  5. A blender
  6. Knife
  7. Measuring cup

Step 1: Extracting avocado

Cut your avocados in 4 portions and extract the avocado that you are going to put directly in the blander. With your measuring cup, get 2 1/2 cups of milk (I used whole milk because I wanted a very rich creamy smoothie) that you are going to add into the blender on top of the avocado portions.

Step 2: Blending

Press on the 'smoothie' button and let it mix for 10 min. Once the content has mixed perfectly stop the blender. You can alternate between the 'smoothie' and the 'ice crush' buttons, as long as your mix looks very smooth and there's no chunks of hard avocado left.

Step 3: Sweetening

Add 3-5 big spoons of honey or caramel, depending on how sweet you want your smoothie to be (I added 4 big spoons of honey because I love really sweet drinks (Guilty!). Once you have added the honey, add the 4 cubes of ice into the mix and start blending on 'ice crush' for another 10 min.

Step 4: Refreshing (Optional)


After 10 min, pour the avocado mixture into a container then leave the container into the fridge for an hour or into the freezer for 10 min. After an hour in the fridge or 10 min into the freezer, get your avocado container et Voila! You have an avocado Smoothie ready to serve!        

Monday, July 30, 2012

DIY: Fringe top

Hello Lovelies,
I was bored yesterday so I decided to recycle some of my clothes and here is an old 'Bob Marley' top I had that I transformed into a fringe top!

 What you need:
1. An old top
2. A pair of scissors (and a ruler for step 4)
3. A marker
4. A tape
5. Your magical fingers!

Step 1: Tape the top


Start by wearing your top and look at yourself in the mirror to decide where you want to cut the top. Then, use a marker to put a small line on the spot. Once you're done, take off your top and place the tape around it. This will give a mark and tell you where to stop cutting.

Step2: Cutting


1. By using your thumb as a measurement, cut vertically until you reach the bottom of the tape. Please don't cut your beautiful thumb!! (advice: make sure that the linings (Seams) of the shirt that are on the sides, are in the middle of your cuts so when you wear your top, it's not going to tear apart, with time).
2. When you're done cutting your fringes, you have to cut the seams (Just cut right above them).

Step 3: Stretch & Twirl


For this step I only have 2 words for it: Stretch-Twirl lol. Yes, you just have to hold one fringe and stretch, then twirl it once. You don't have to twirl it though. I always do it because I want my fringes to be more spaced out from each other.

Step 4: Cutting the neckline (Optional)

You don't have to do this step if you already like the neckline of the t-shirt you used. Mine was not that good and I wanted something different so I added the small opening that you can see on the first picture. For that, I used the top tag to measure the cut and from the middle of the neckline, I put a point 4 cm from the neckline. I used the ruler to trace 2 lines from the neckline to the point before I cut it.

Thanks for reading my post and hope you liked my first DIY project. Let me know if I need to clarify anything.
Xoxo